
Entry Name: "TTU-Vuong-MC1"
VAST Challenge 2019
Mini-Challenge 1
VAST Challenge 2019
Mini-Challenge 1
Team Members:
Ngan Vuong, iDV Lab, Texas Tech University, ngan.v.t.nguyen@ttu.edu PRIMARYTommy Dang, iDV Lab, Texas Tech University, tommy.dang@ttu.edu
Student Team: YES
Tools Used:
HTML, CSS, JavaScriptD3.js
GitHub: https://github.com/iDataVisualizationLab/N/tree/master/VAST19/mc1>
Web demo: https://idatavisualizationlab.github.io/N/VAST19/mc1/index.html
Approximately how many hours were spent working on this submission in total?
100 hoursMay we post your submission in the Visual Analytics Benchmark Repository after VAST Challenge 2019 is complete? YES
Video
https://idatavisualizationlab.github.io/N/VAST19/mc1/video.htmlSystem Overview
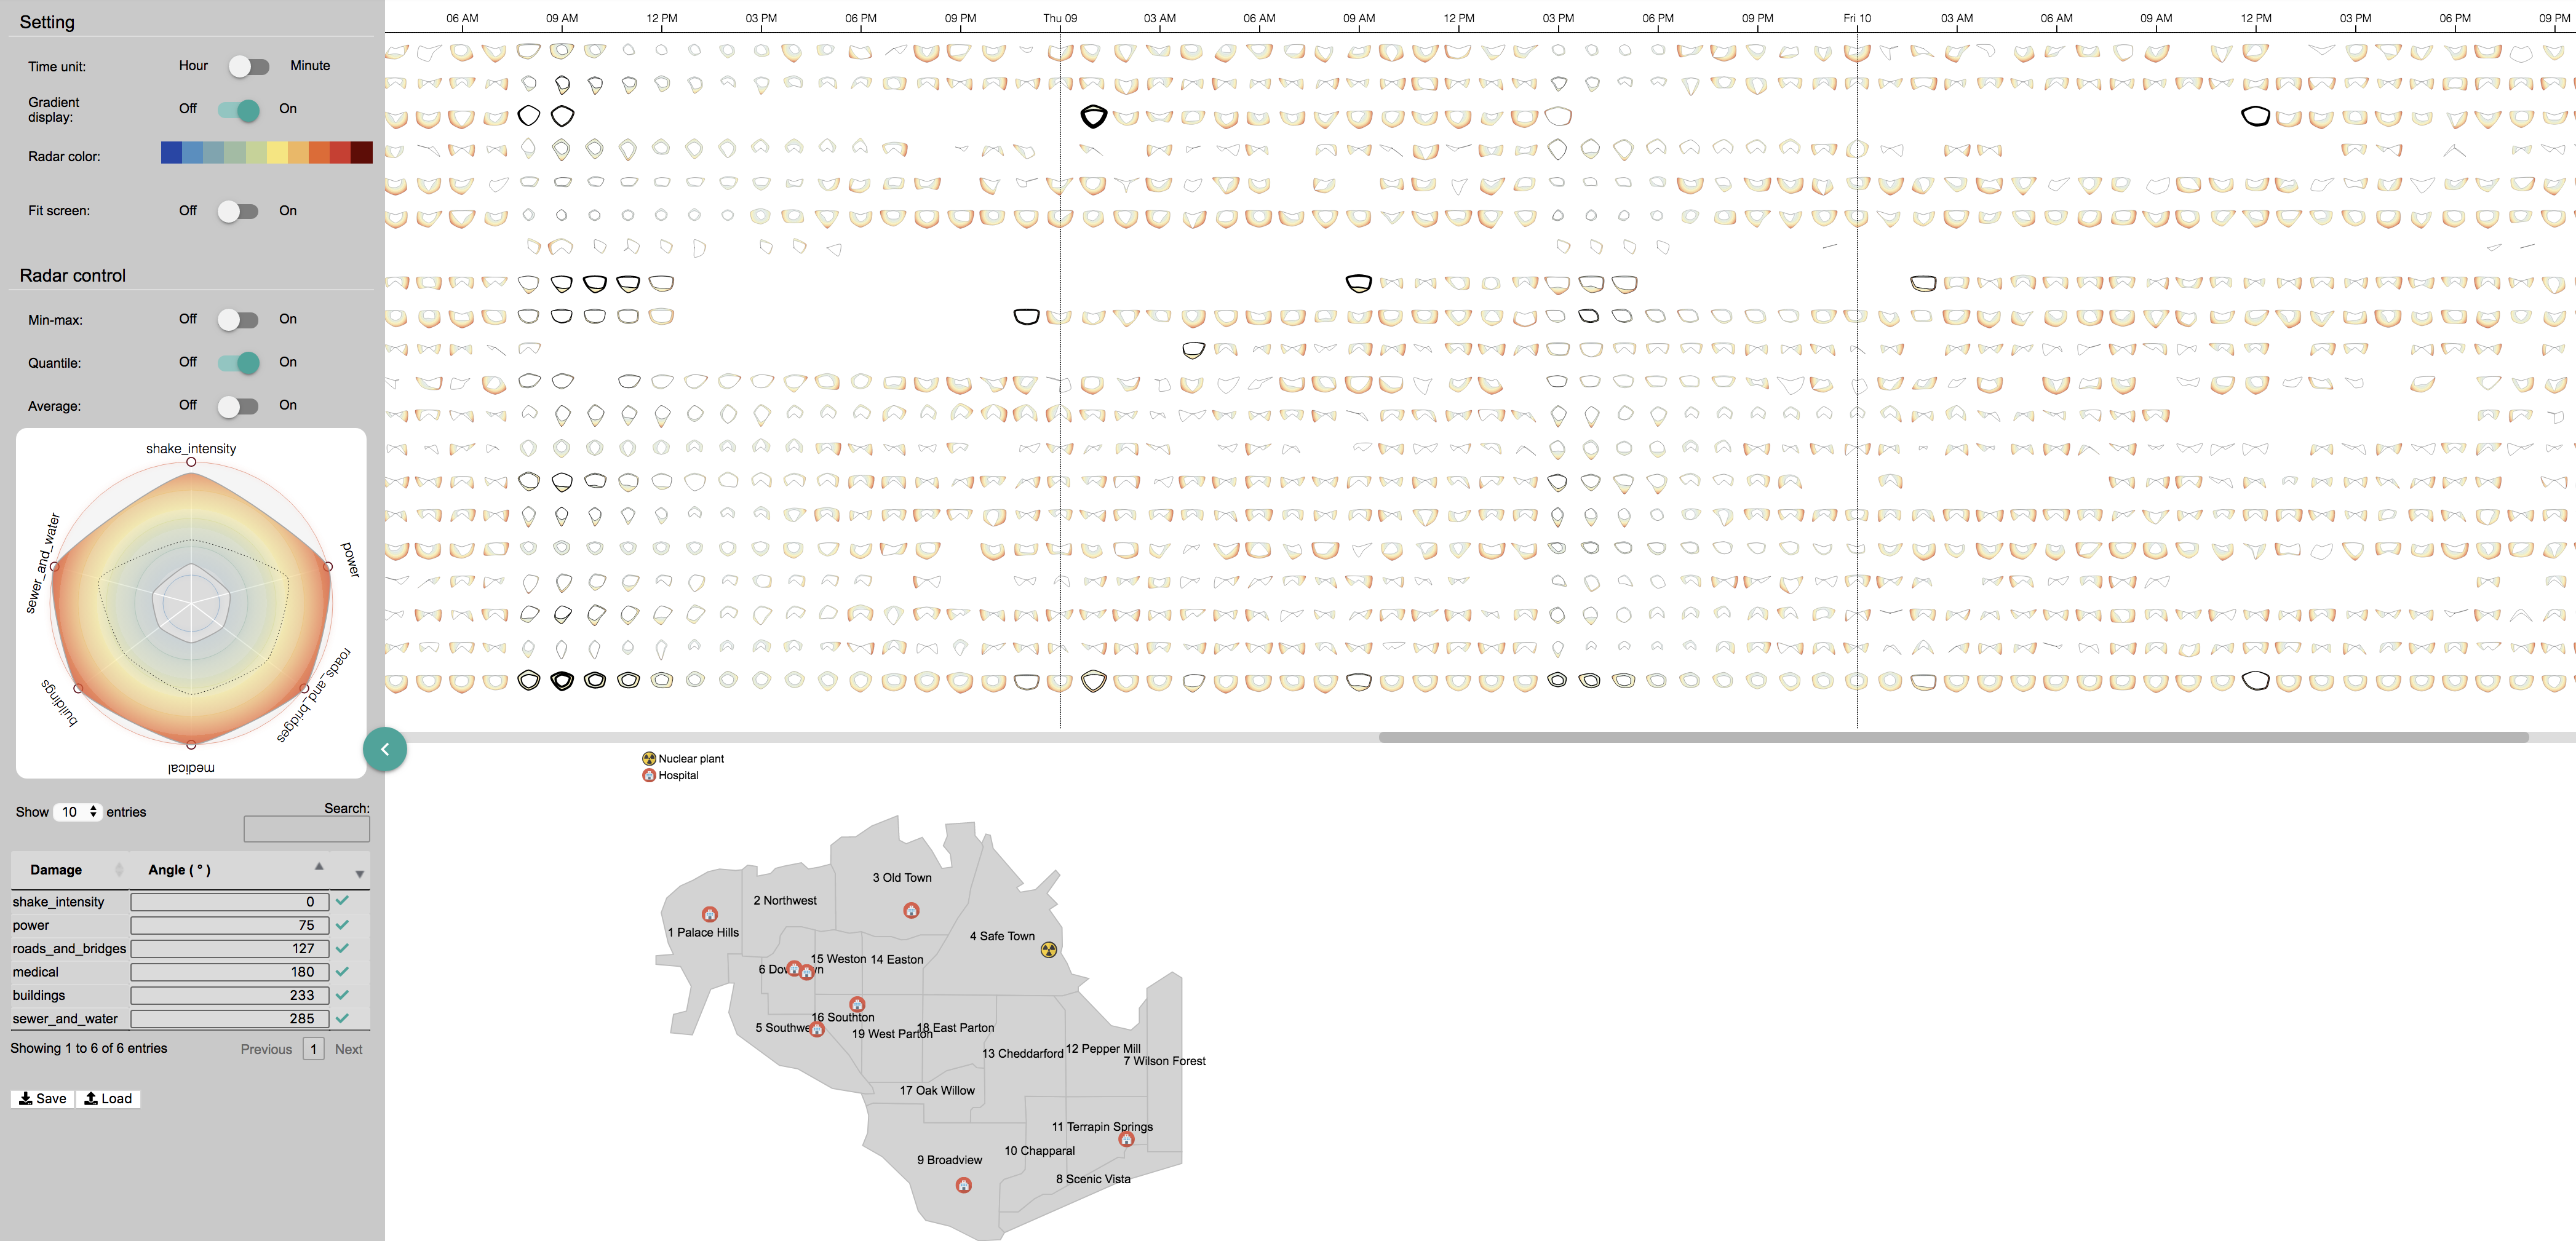
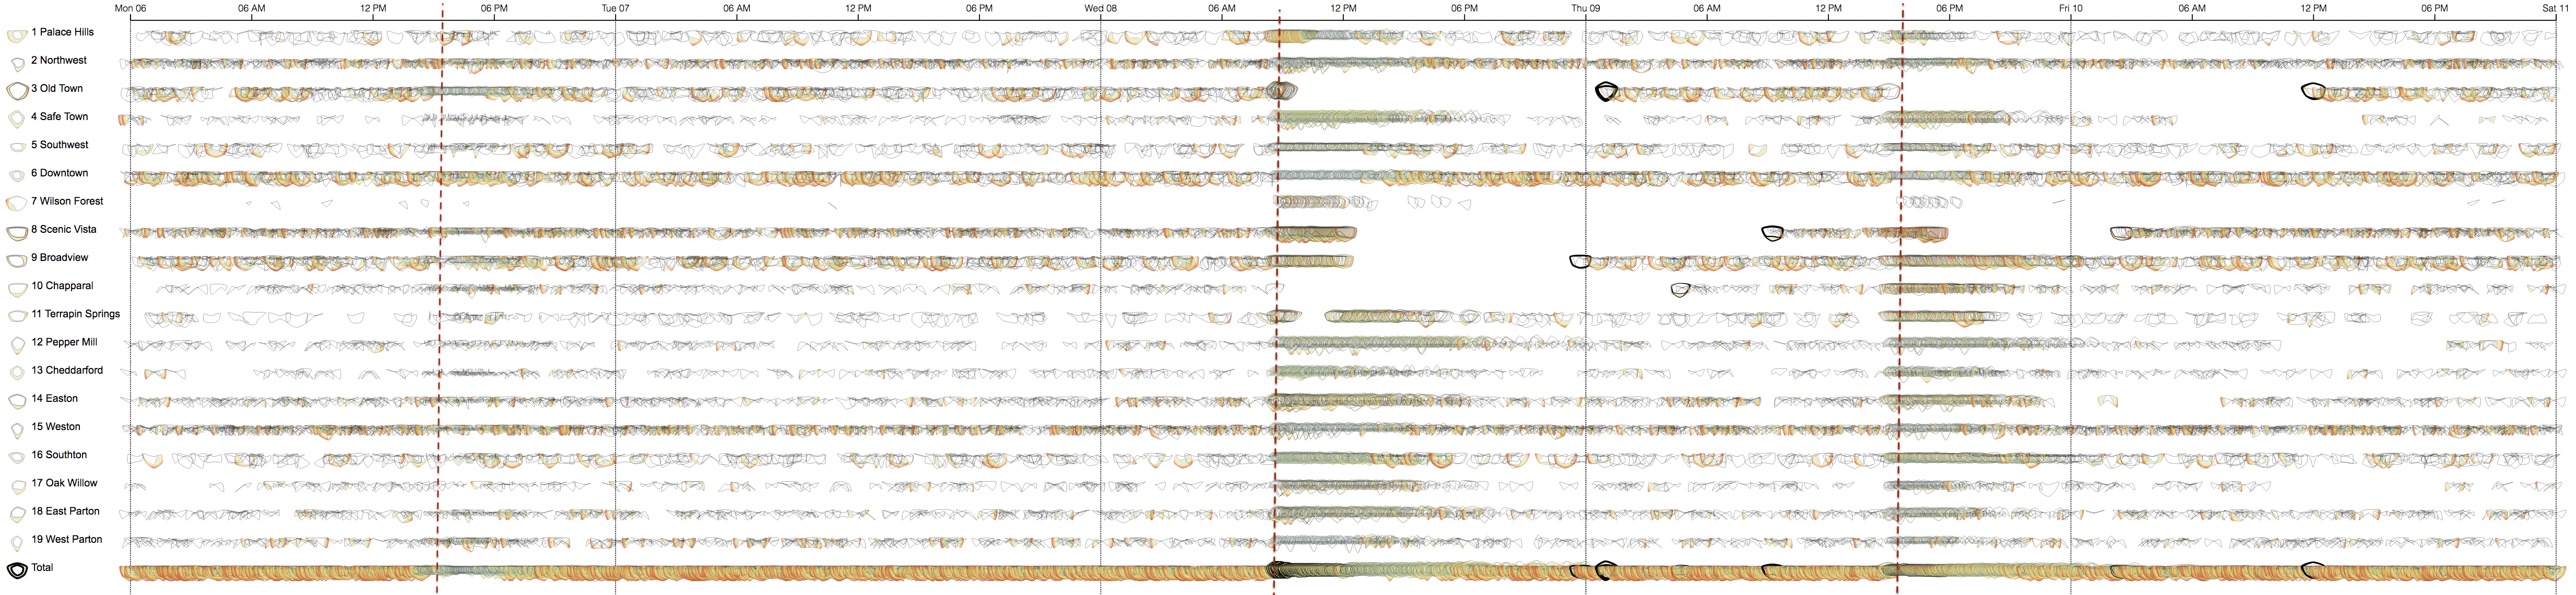
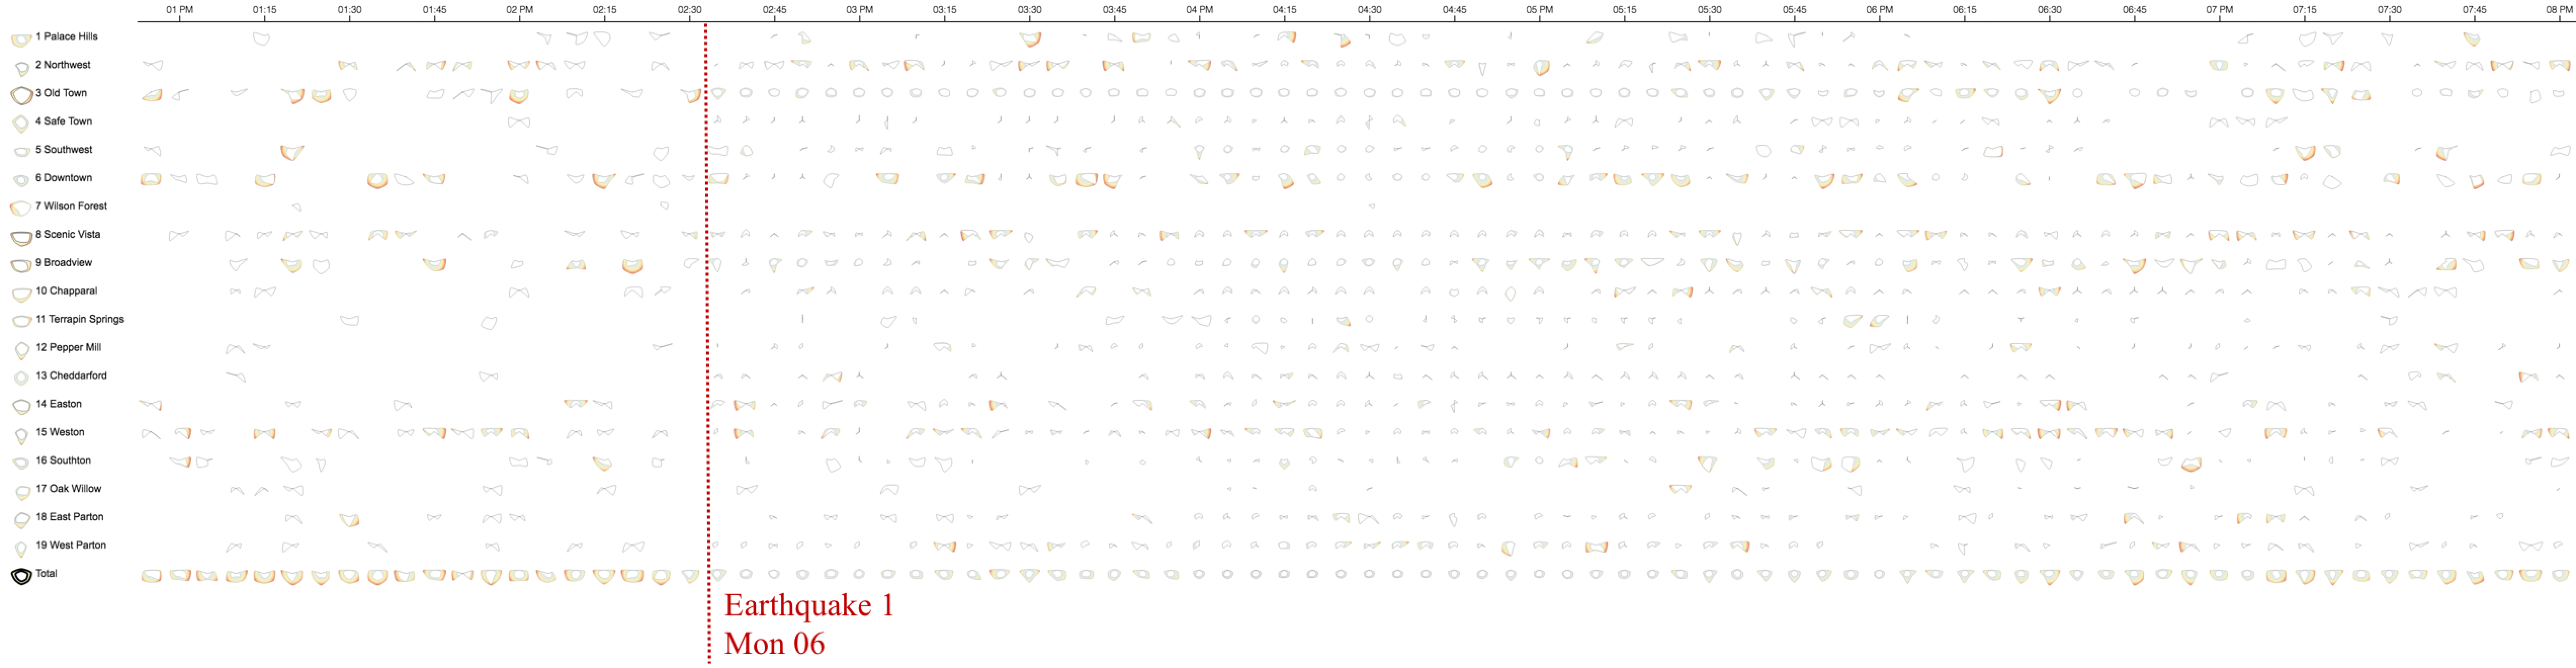
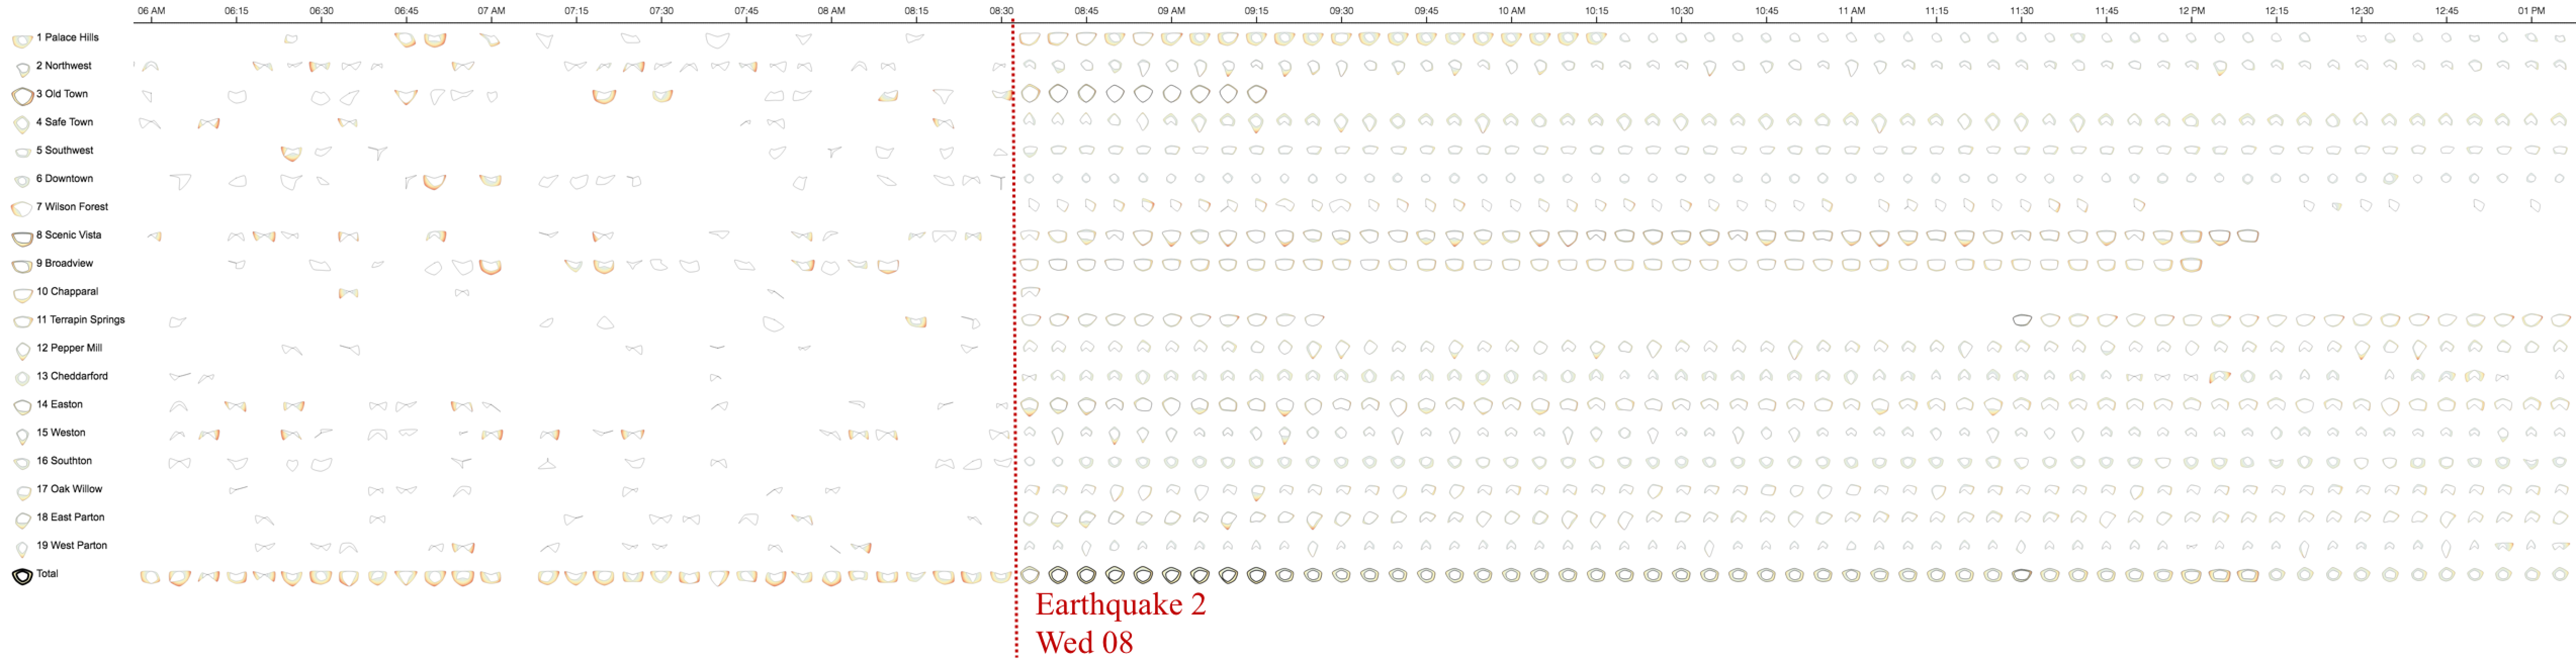
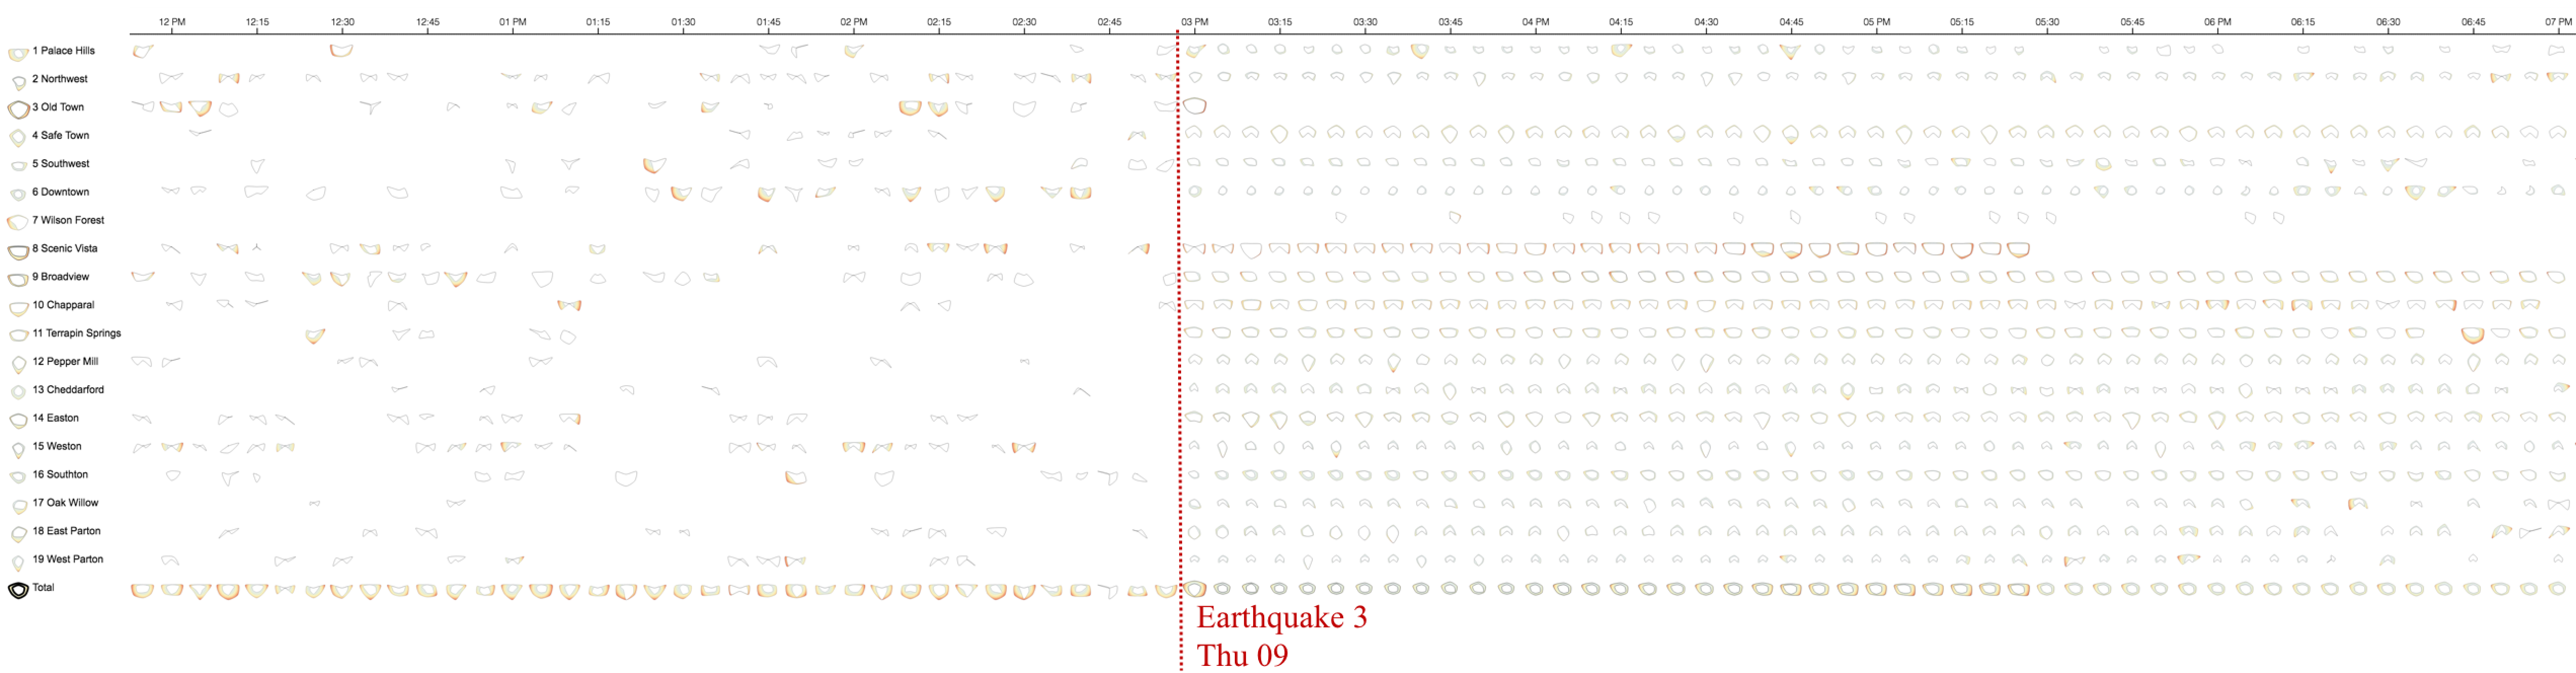
Figure 1. Our visual interface: (left) control panel, (top) Main view, and (bottom) St. Himark map
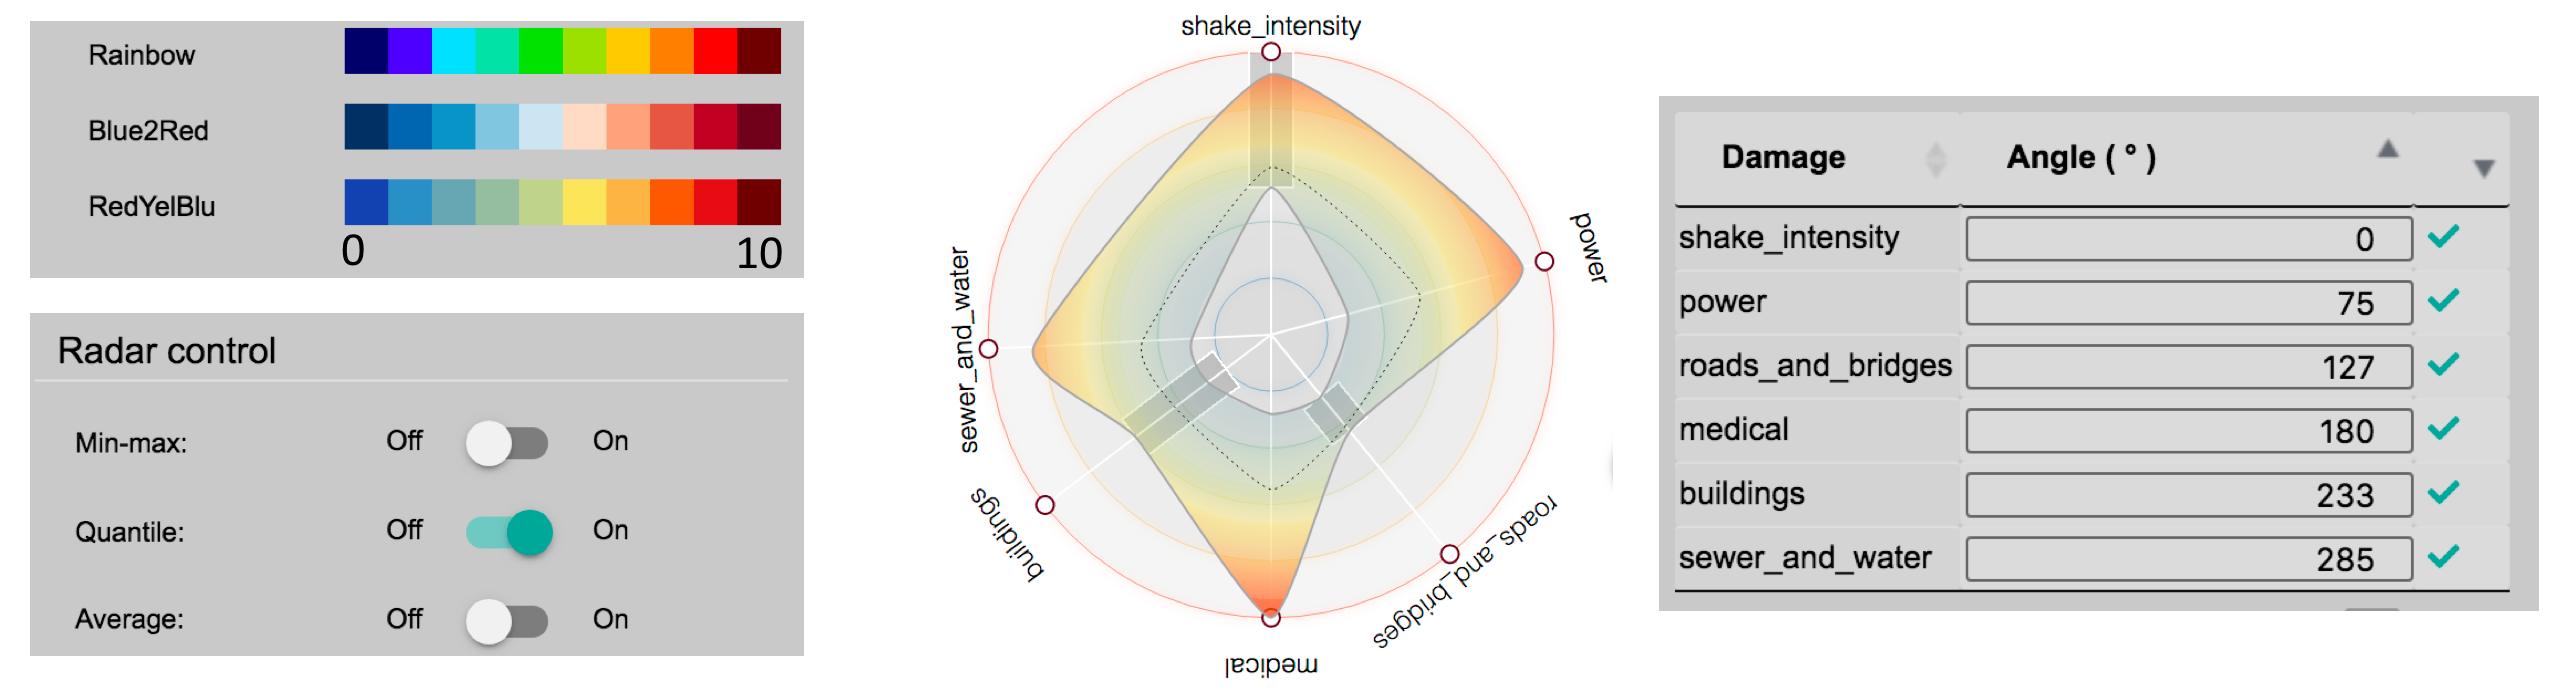
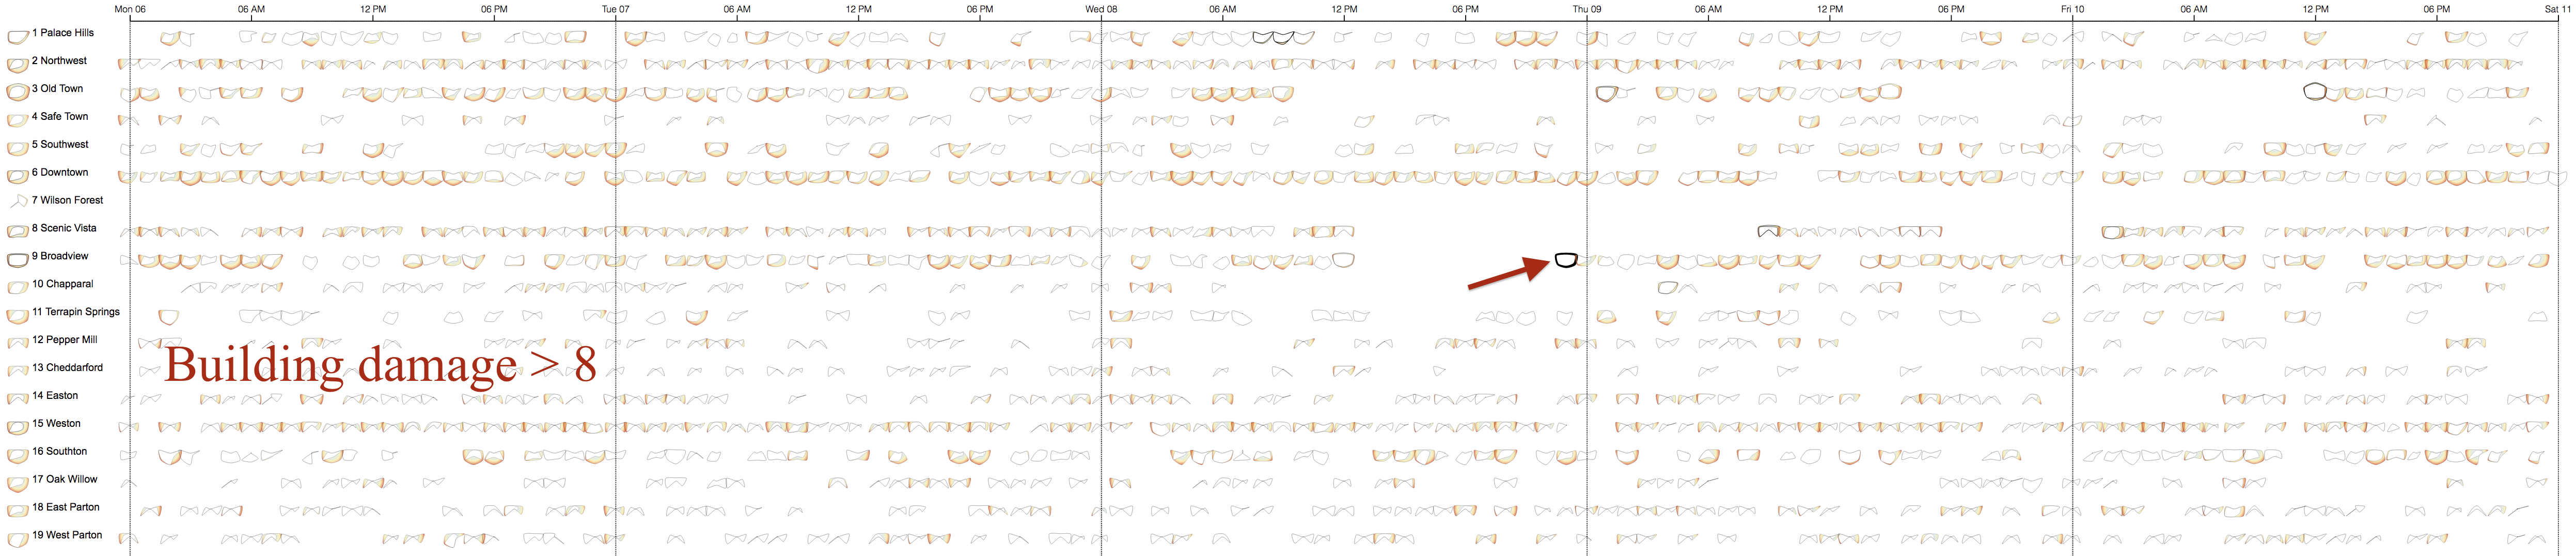
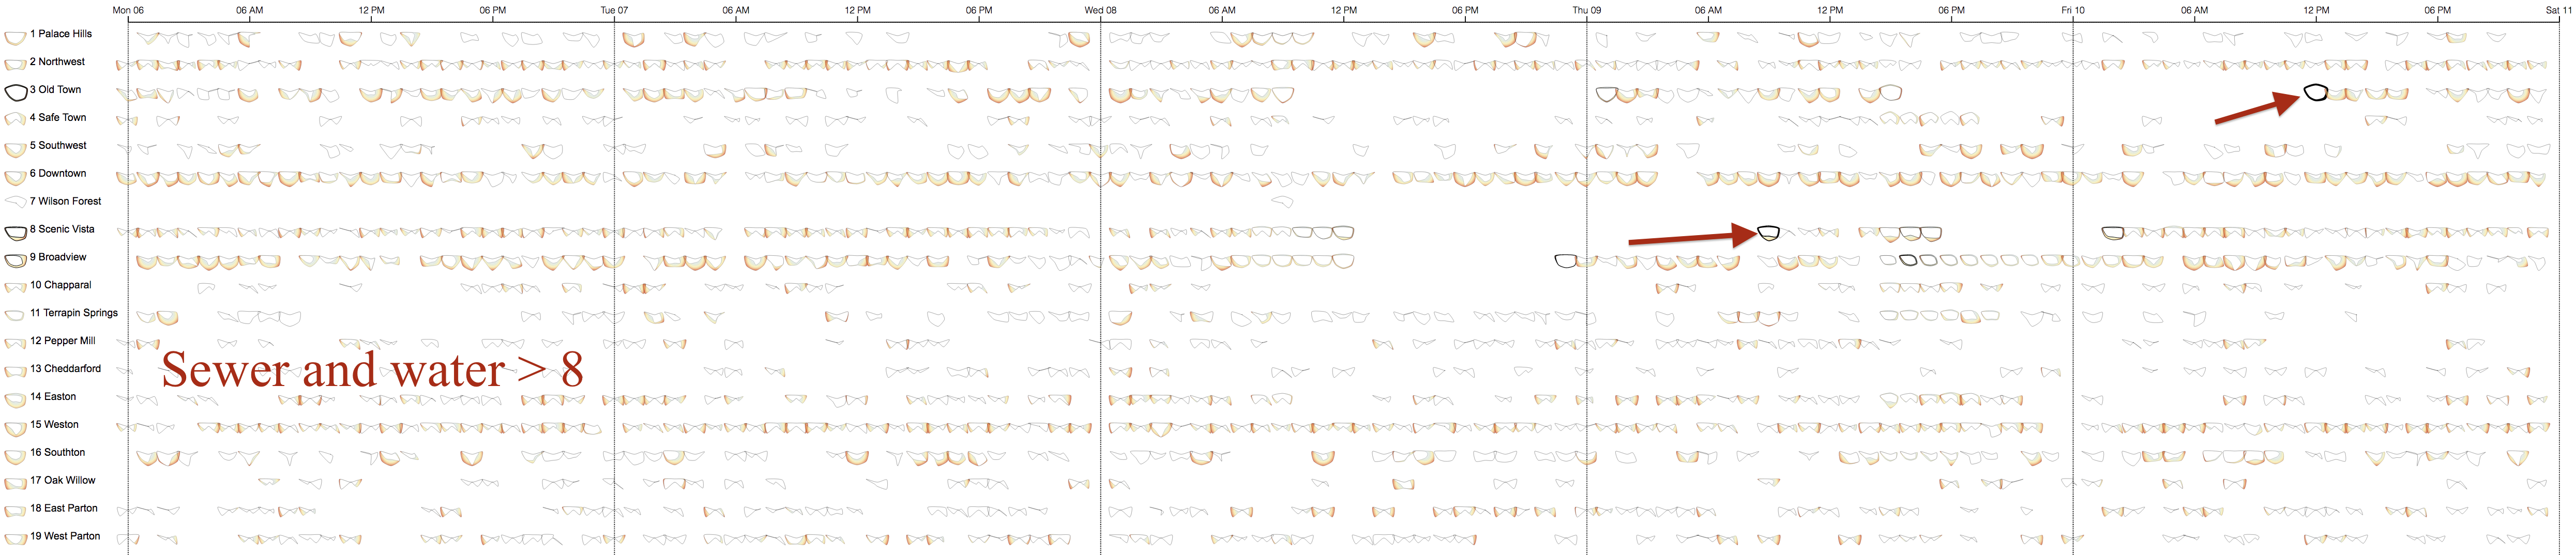
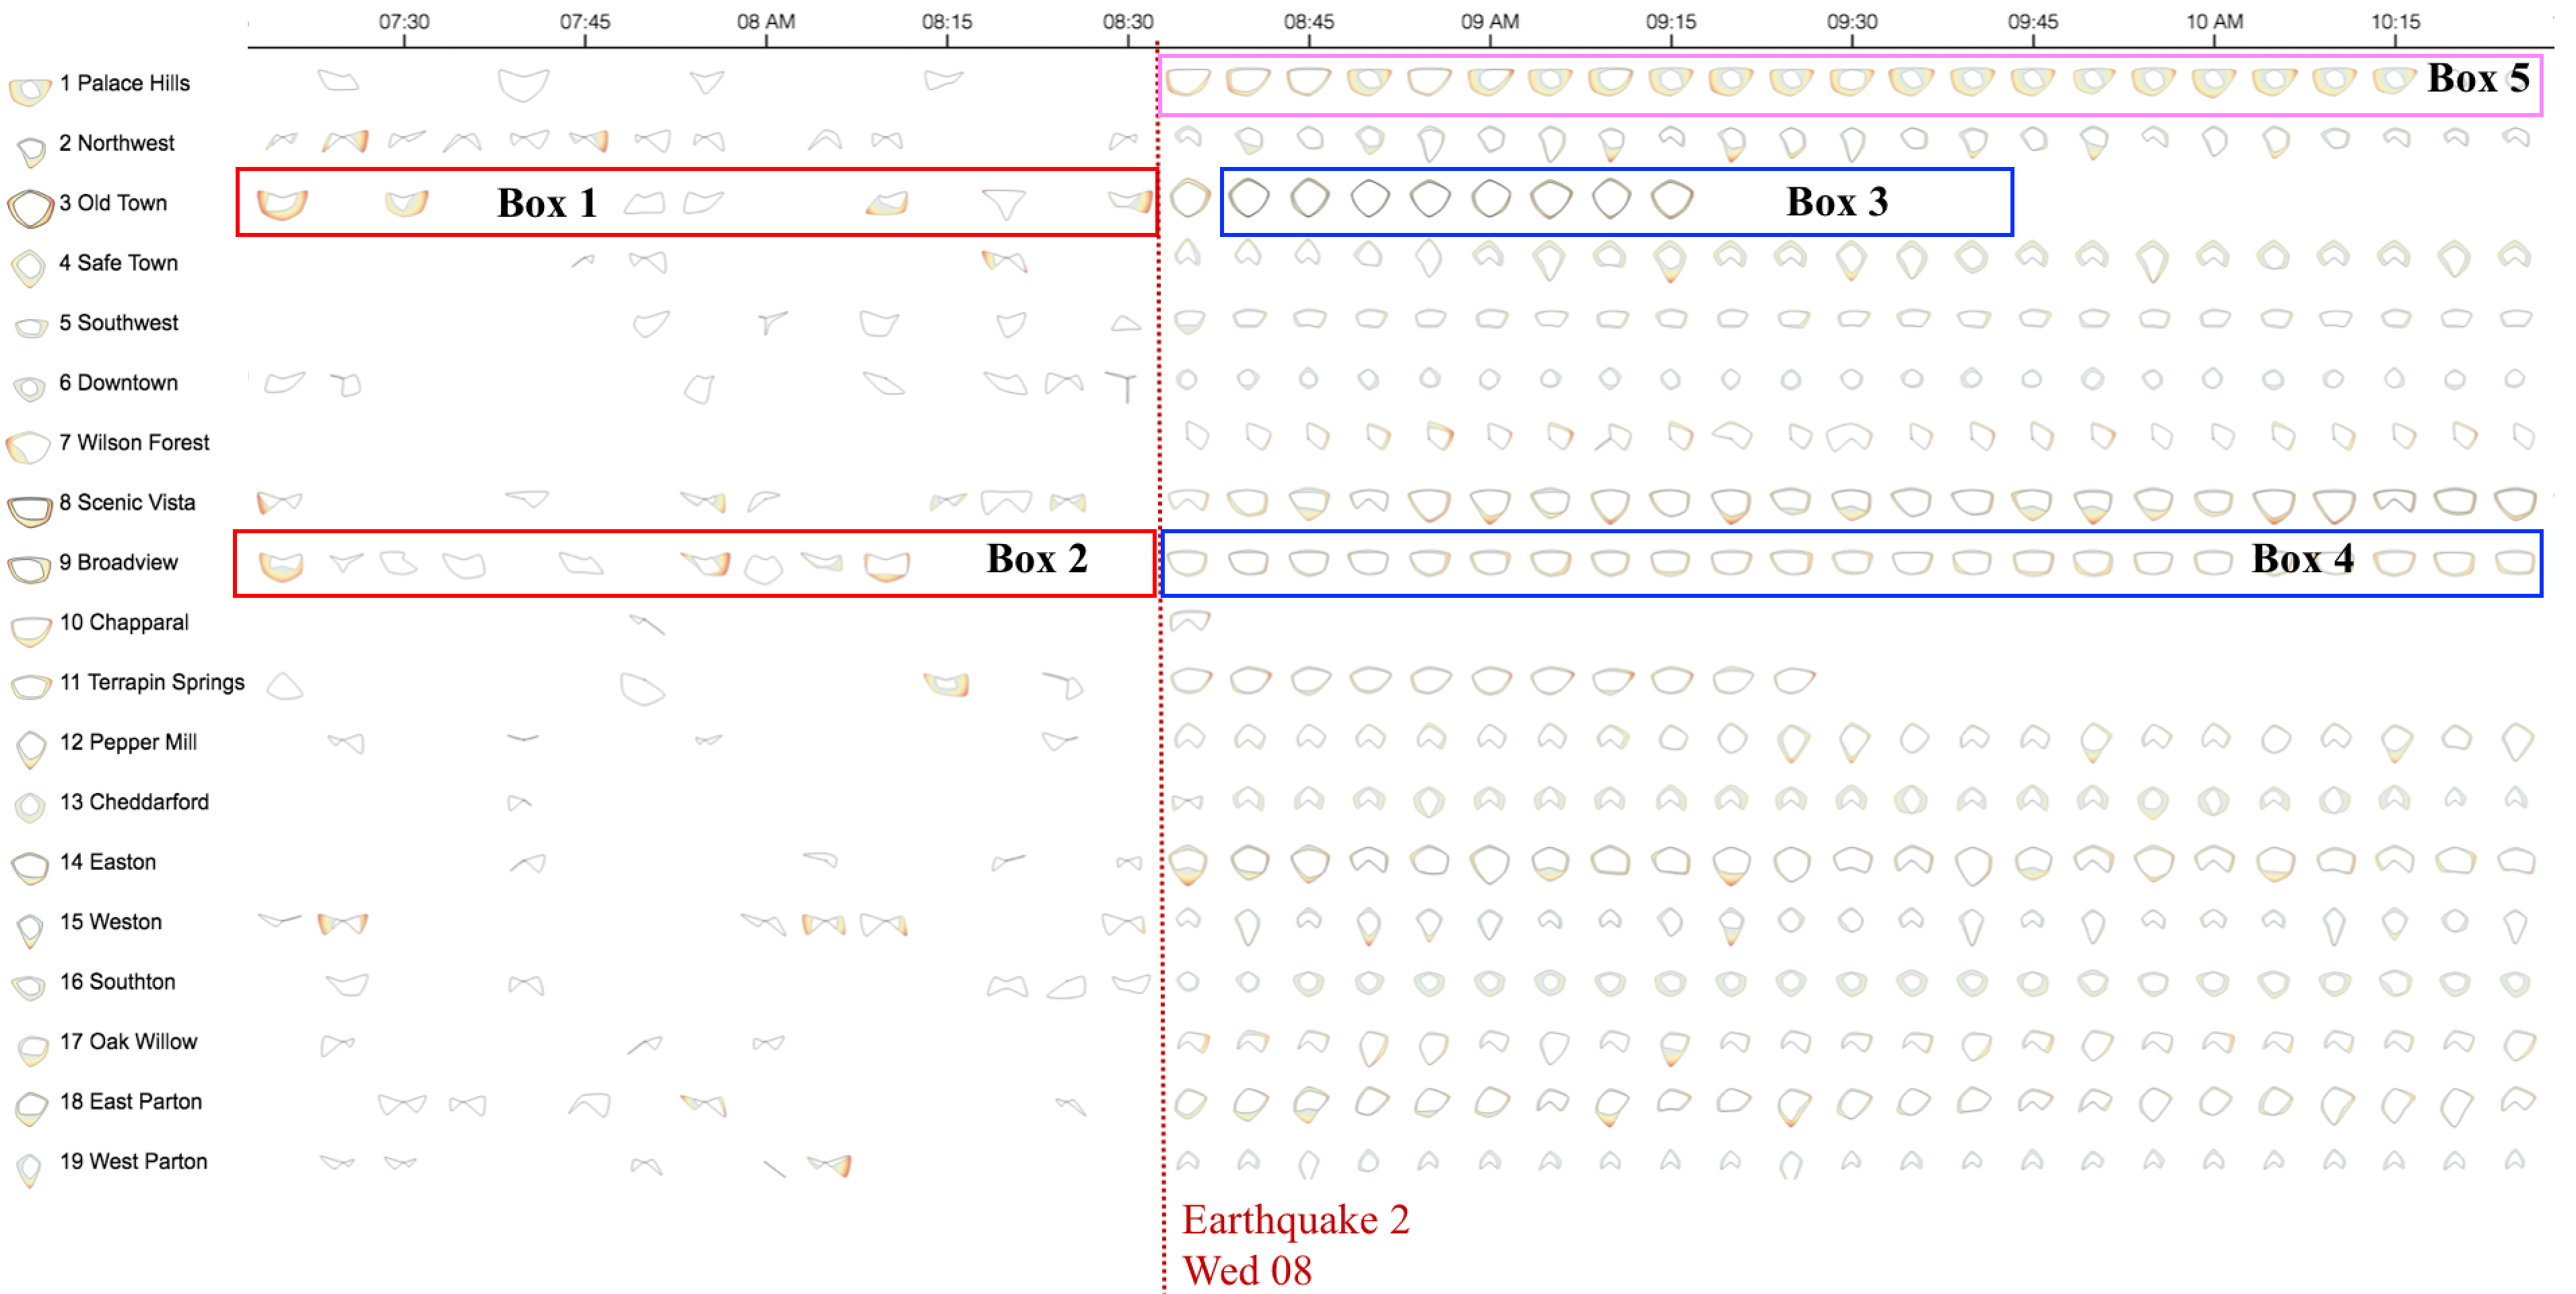
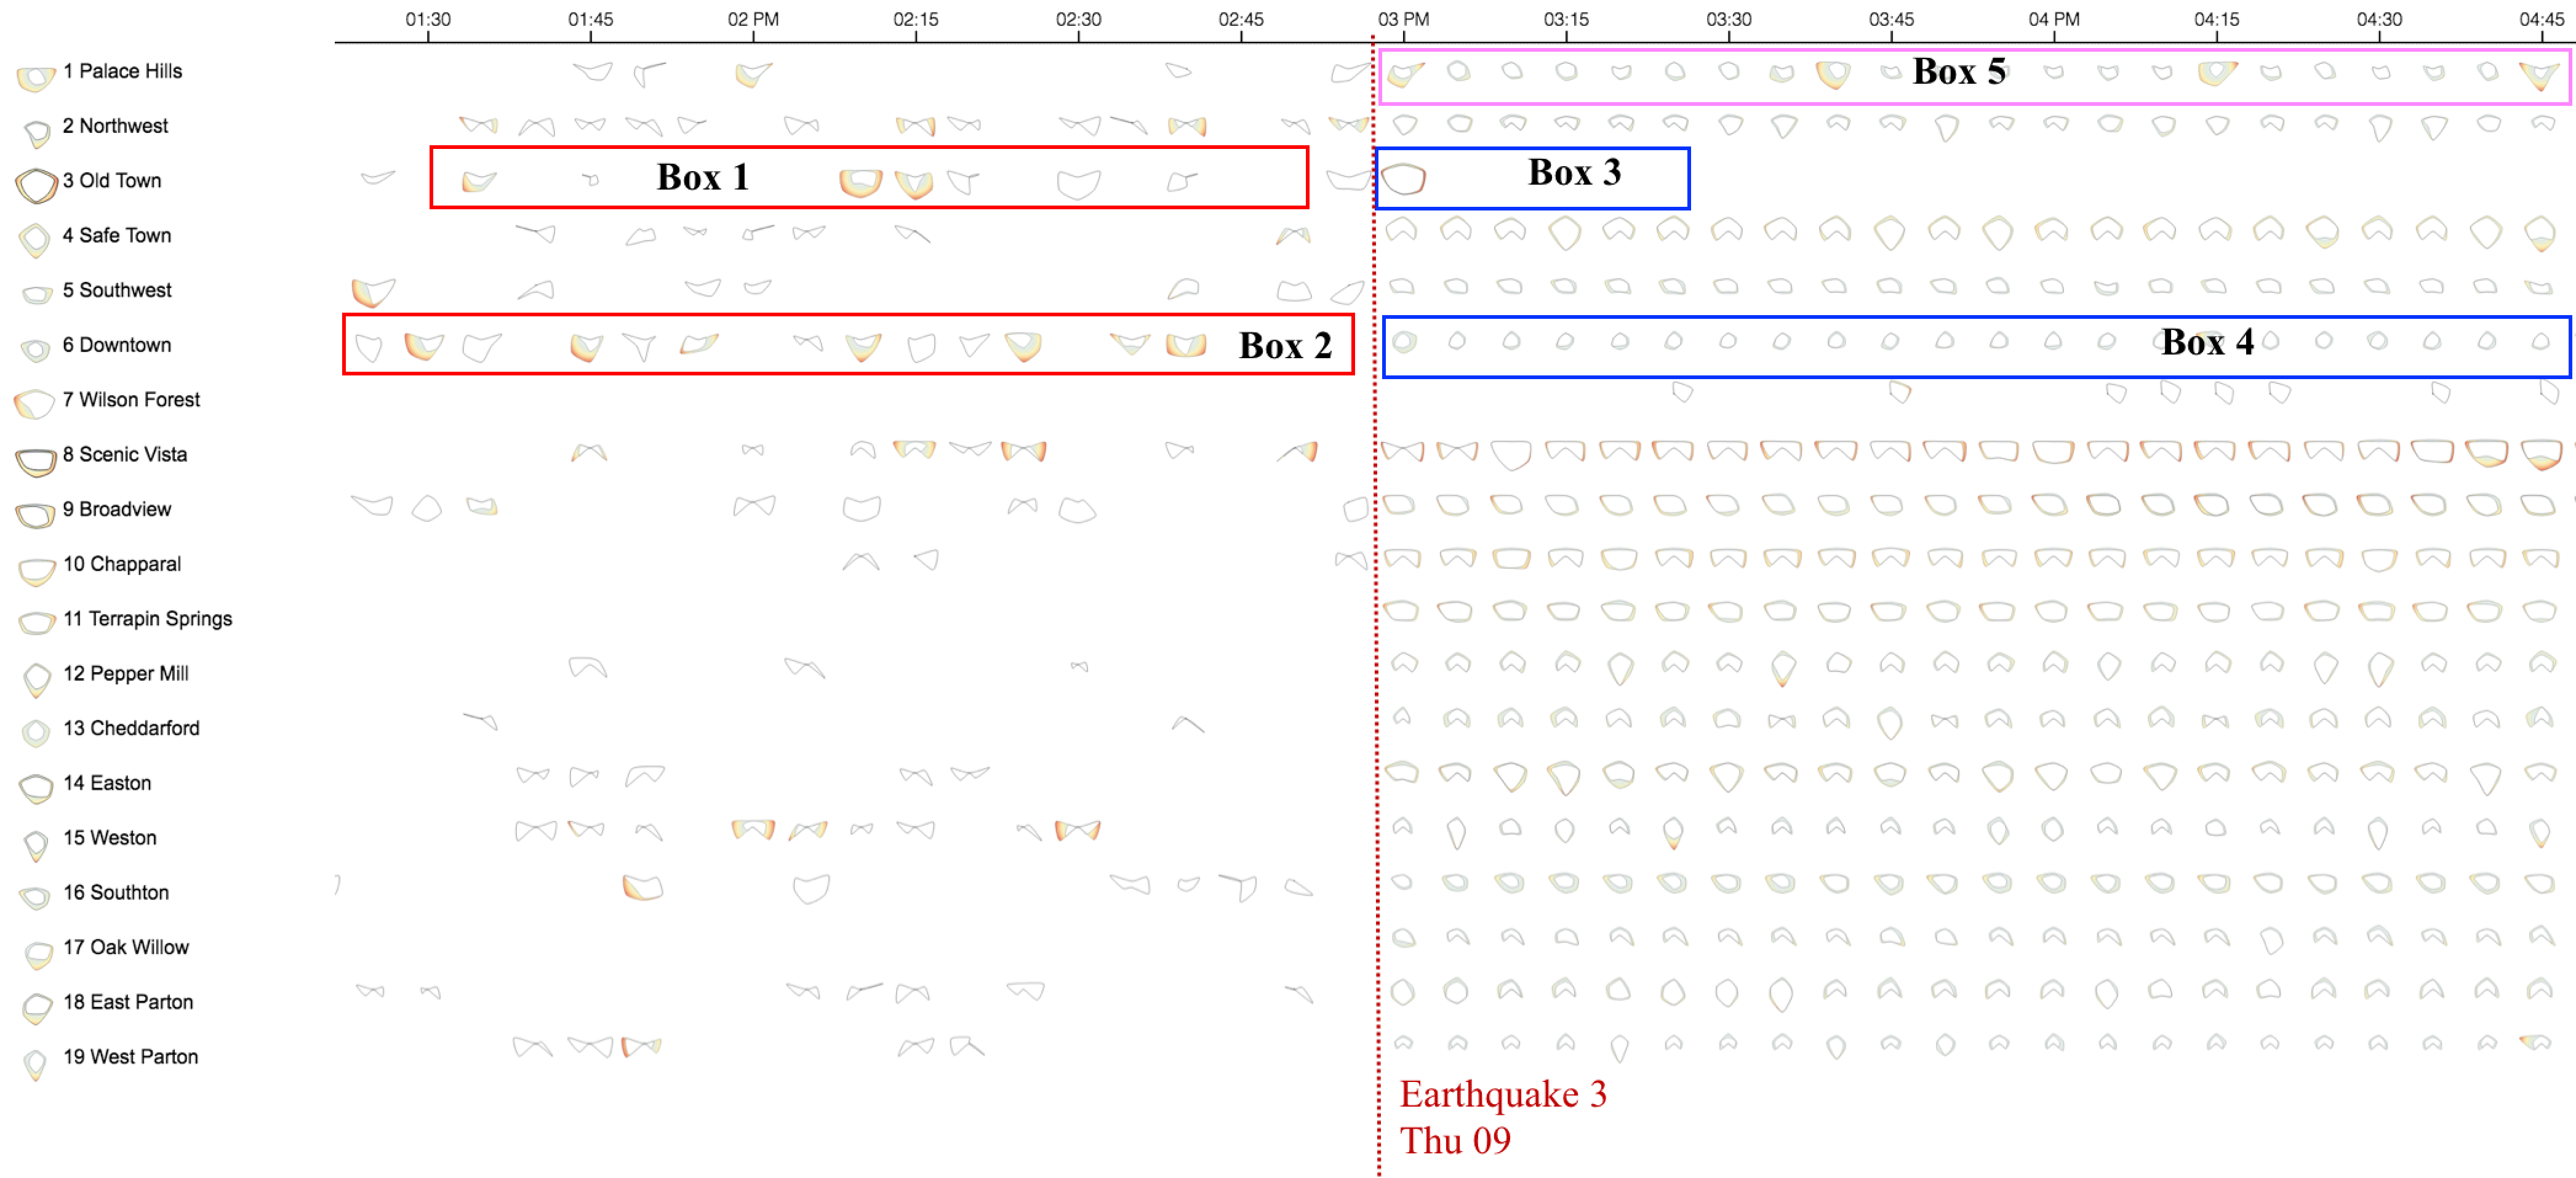
Radar chart design:
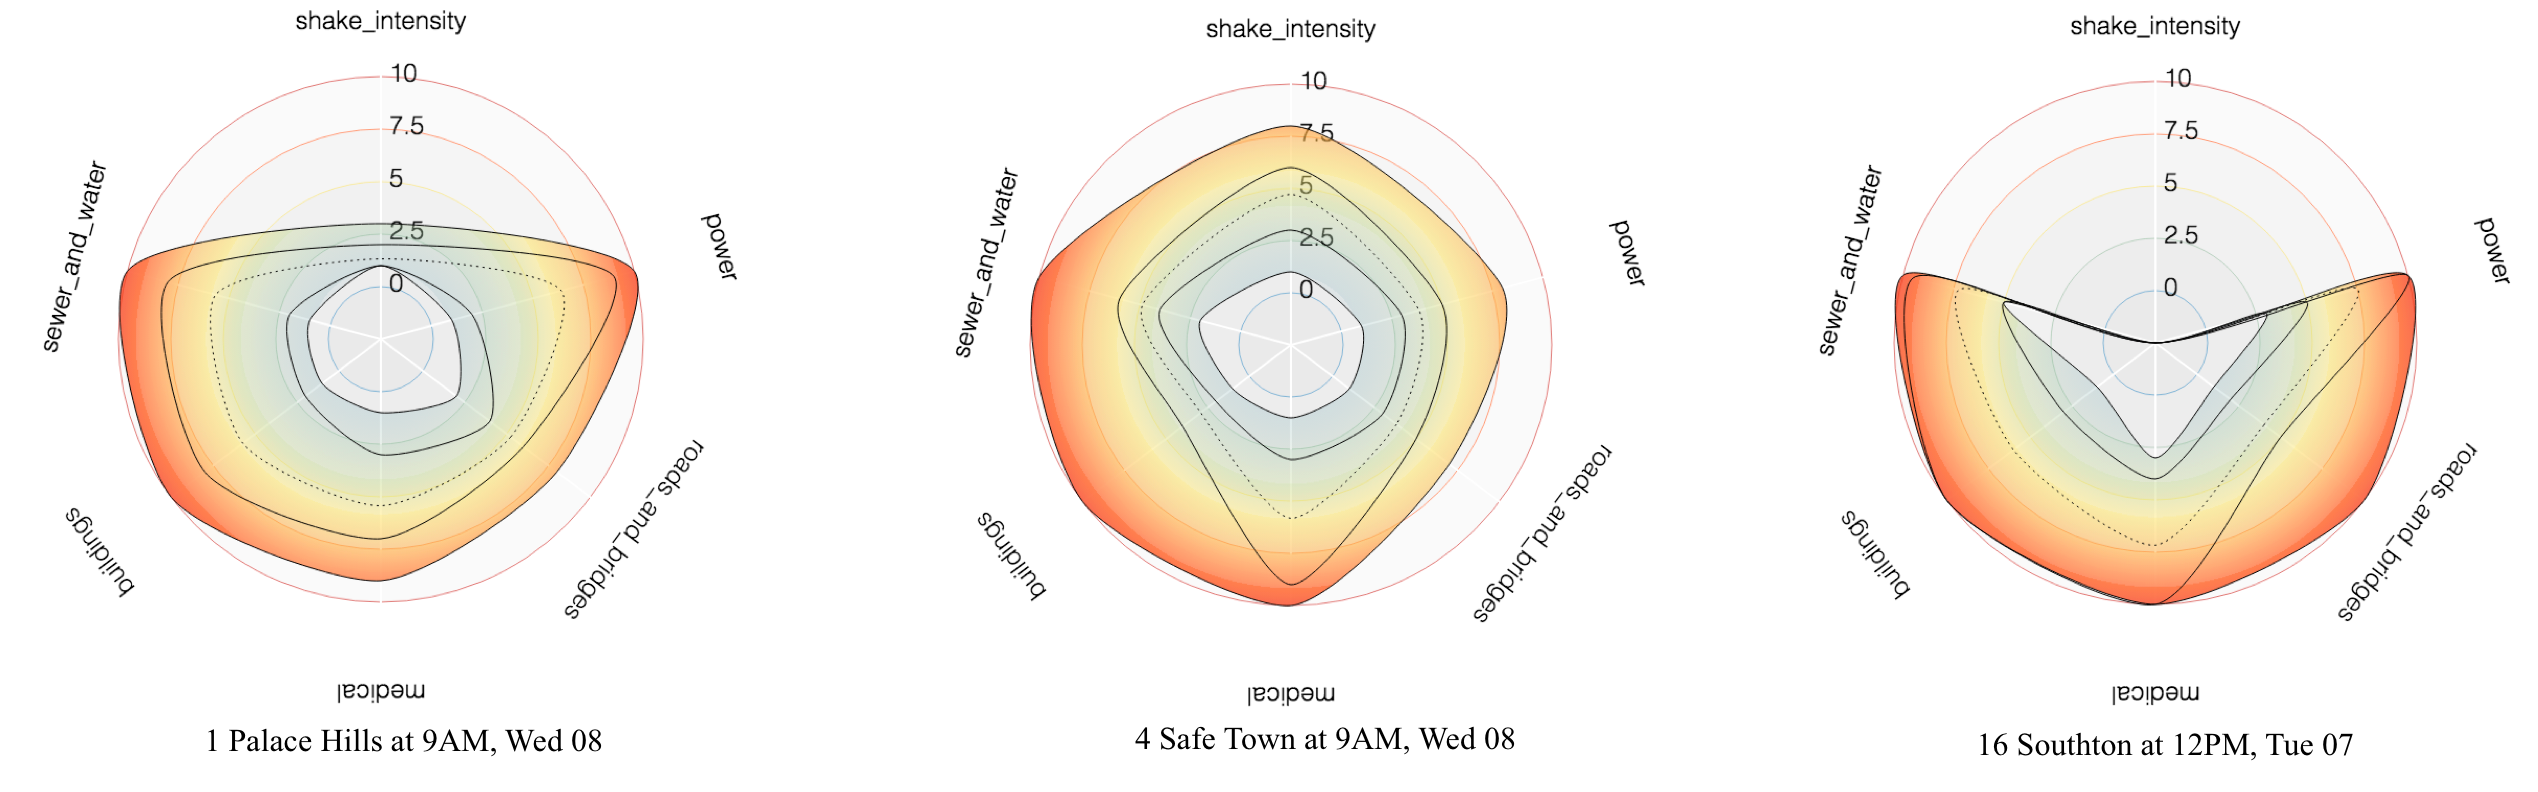
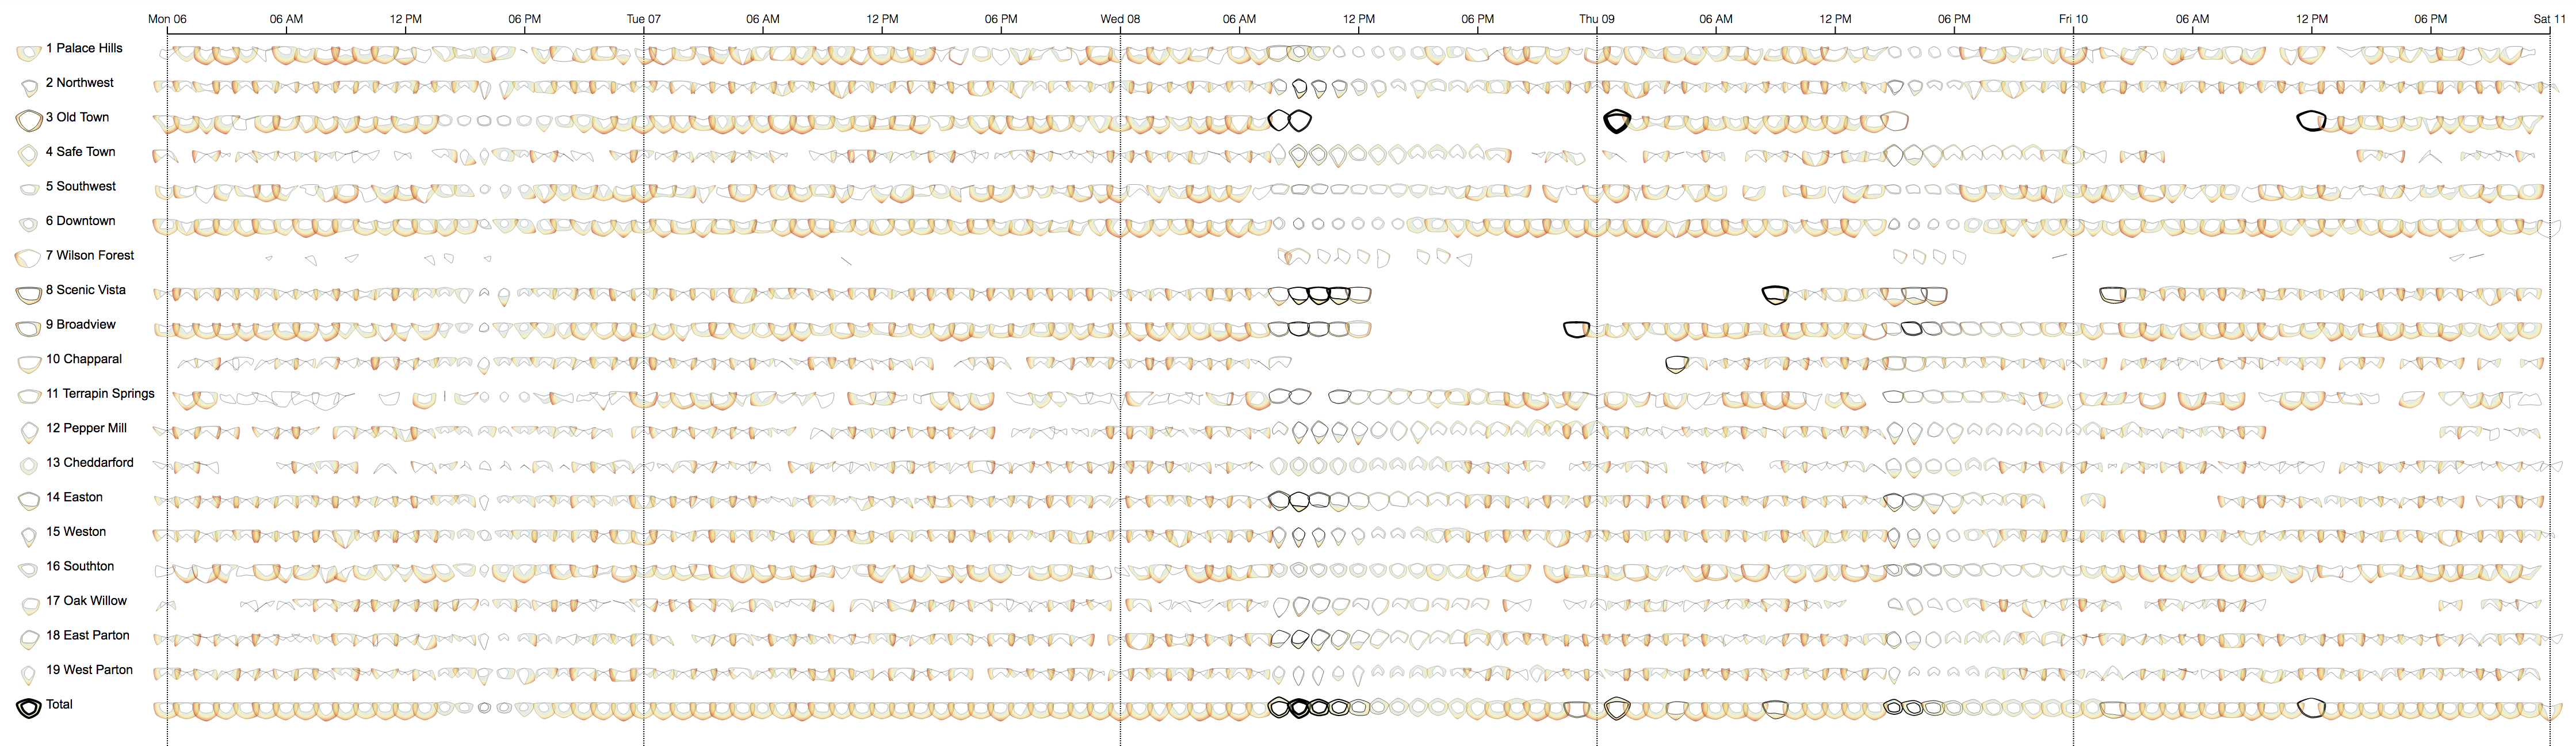
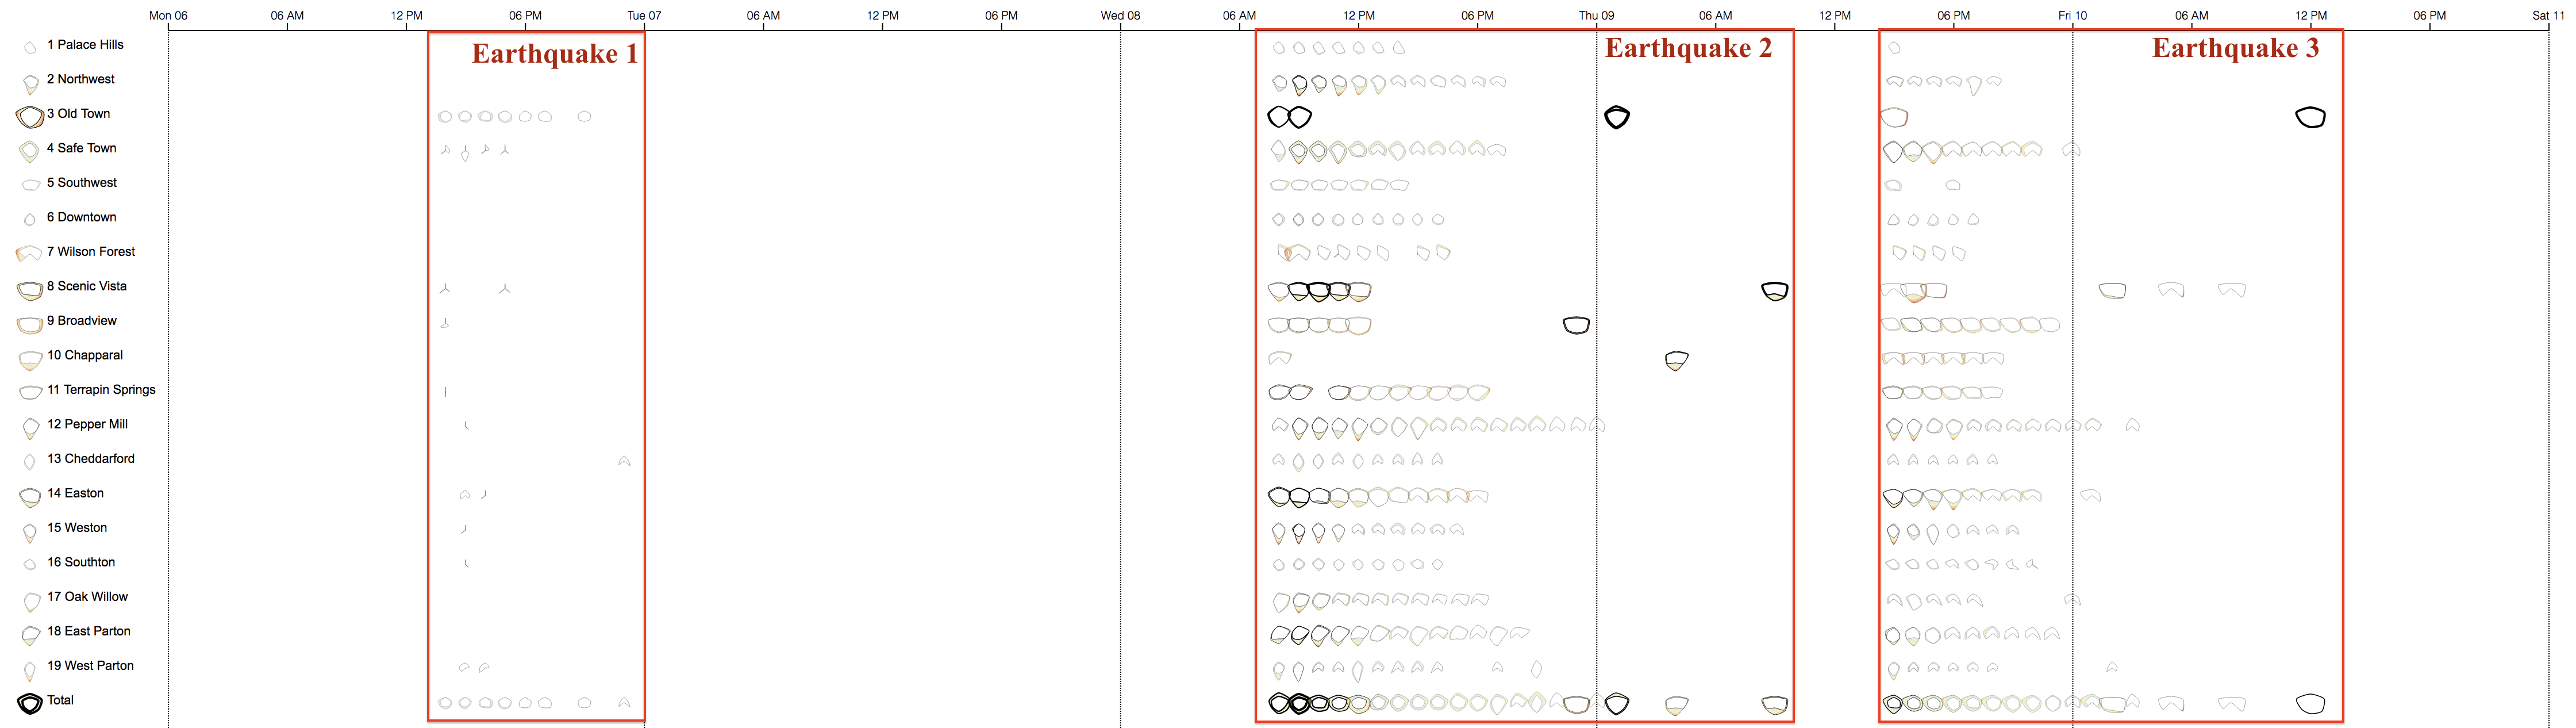
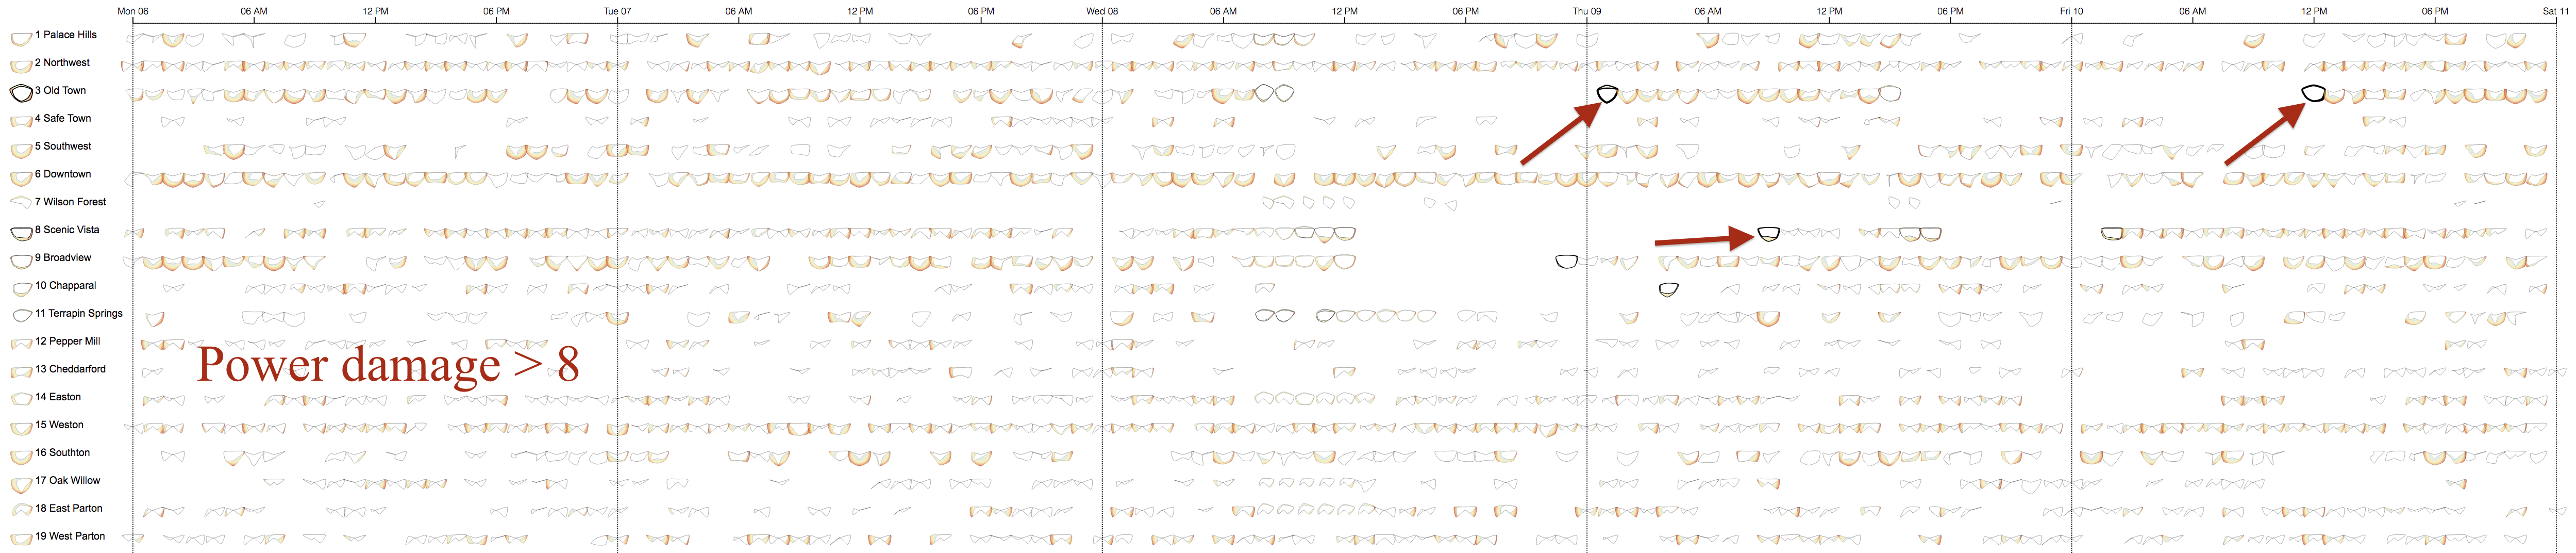
Figure 2. Examples of Radar design for hourly multivariate summary of 3 regions: Palace Hills, Safe Town, and Southon.
Due to the limited screen display and a large number of data entries, we revise the radar chart to embed the transformed color scale directly into the inside area of the radar. Our customized radar adopts the box plot layout which shows the five-number summary: minimum (inner curve), first quartile, mean (dashed curve), third quartile, and maximum (outer curve). This allows users to quickly spot the multivariate values (shake intensitive and various types of damage) as depicted in Figure 2. In the examples in the report show the hourly summary (from left to right) of various regions (top-down) of St. Himark